
BASIC ANIMATION LAB
LAB INTRODUCTION: WELCOME TO THE HUMAN WALK CYCLE
The bouncing ball, the exercise we did during lecture, is one of the essential fundamental exercises for the beginning animator. After you understand how you can manipulate timing, how contact frames work, and etc., you can easily apply these key concepts to any other animation you'll be creating in the future. If you are serious about continuing animation in the future, again, I encourage you to familiarize yourself with the 12 Principles of Animation that we briefly introduced during lecture.
So, with this, this lab is a guide, a sort of how-to, on creating a walk cycle. Once you get the hang of this standard cycle, we highly suggest you create your own unique walk cycle for your main character.
DISCLAIMER: In this lab, I will be working digitally on Photoshop. If you are working traditionally, you should still follow along, but please make sure that the "Layers" in Photoshop are your different pieces of paper that you'll be scanning in individually and compositing and exporting the file with Photoshop.
You have the choice from doing POSE-TO-POSE ANIMATION or FRAME-BY-FRAME ANIMATION. Because I tend to work pose-to-pose, I will be guiding this lab as so. If you are already more familiar with animation and prefer frame-by-frame, feel free to use your method instead!
Here is the final product we are more or less expecting at the end of this lab:

GETTING STARTED WITH PHOTOSHOP
First, if you are a digital artist, please make sure to download Photoshop CS6 or CC, which you can get for free if you are a UC Berkeley student. If you have any trouble with that, please shoot us an e-mail at adfa@ucbugg.com.
Now, after that's done, let's open up a new file on Photoshop. As it is the industry standard, we want a 16:9 resolution. Let's make a high quality image: 1920x1080 pixels, 300 dpi. Name the file as you wish.

Now that we have our document set up, I want to get started with a few layers, just to get myself ready and set up. I'll make 3 new layers and rename them. I'll be doing this in pose-to-pose animation, and I know that I want the walk cycle to be cut into three main key frames. I can delete the extras later, but in case I make mistakes, I want to keep extra layers on hand.

At this point, after I've created my layers, I'm going to rename them as necessary so as to not confuse myself. The way I work is renaming all these layers to "KF 1," "KF 2," KF3," etc., and making folders for my in-betweens that would go between, say, KF 1 and KF 2 as "1-2." You don't necessarily have to work this way, but just keep this in mind as I go through the lab so you don't get confused with my numbering system.

CREATING VIDEO TIMELINE
As you're prepping your hands to begin an intense drawing session, you should begin to realize how important character turnarounds are to animating. For example, if you do not know how your stick figure looks in profile view, you will probably draw your figure's profile inconsistently and end up with a wonky-looking animation. So, just so I don't have a problem with this, I created a quick turnaround for my stick person.

To get started, you'll want to open up the Video Timeline by going to Windows > Timeline. From here, a bar should pop up at the bottom of your Photoshop window, which looks like this:

You'll notice that there's a little arrow next to the "Create Video Timeline," and if you click on it, you can see that you have two options: "Create Video Timeline" and "Create Frame Animation." We want to use the "Create Video Timeline" option, as it may already be intuitive to some of you on how to use it; it's almost like a video editor.
When you click on the button, and if you've been following my organization methods, a series of purple and/or grey bars should appear. From here, I'm going to change my frame rate to 30 fps.
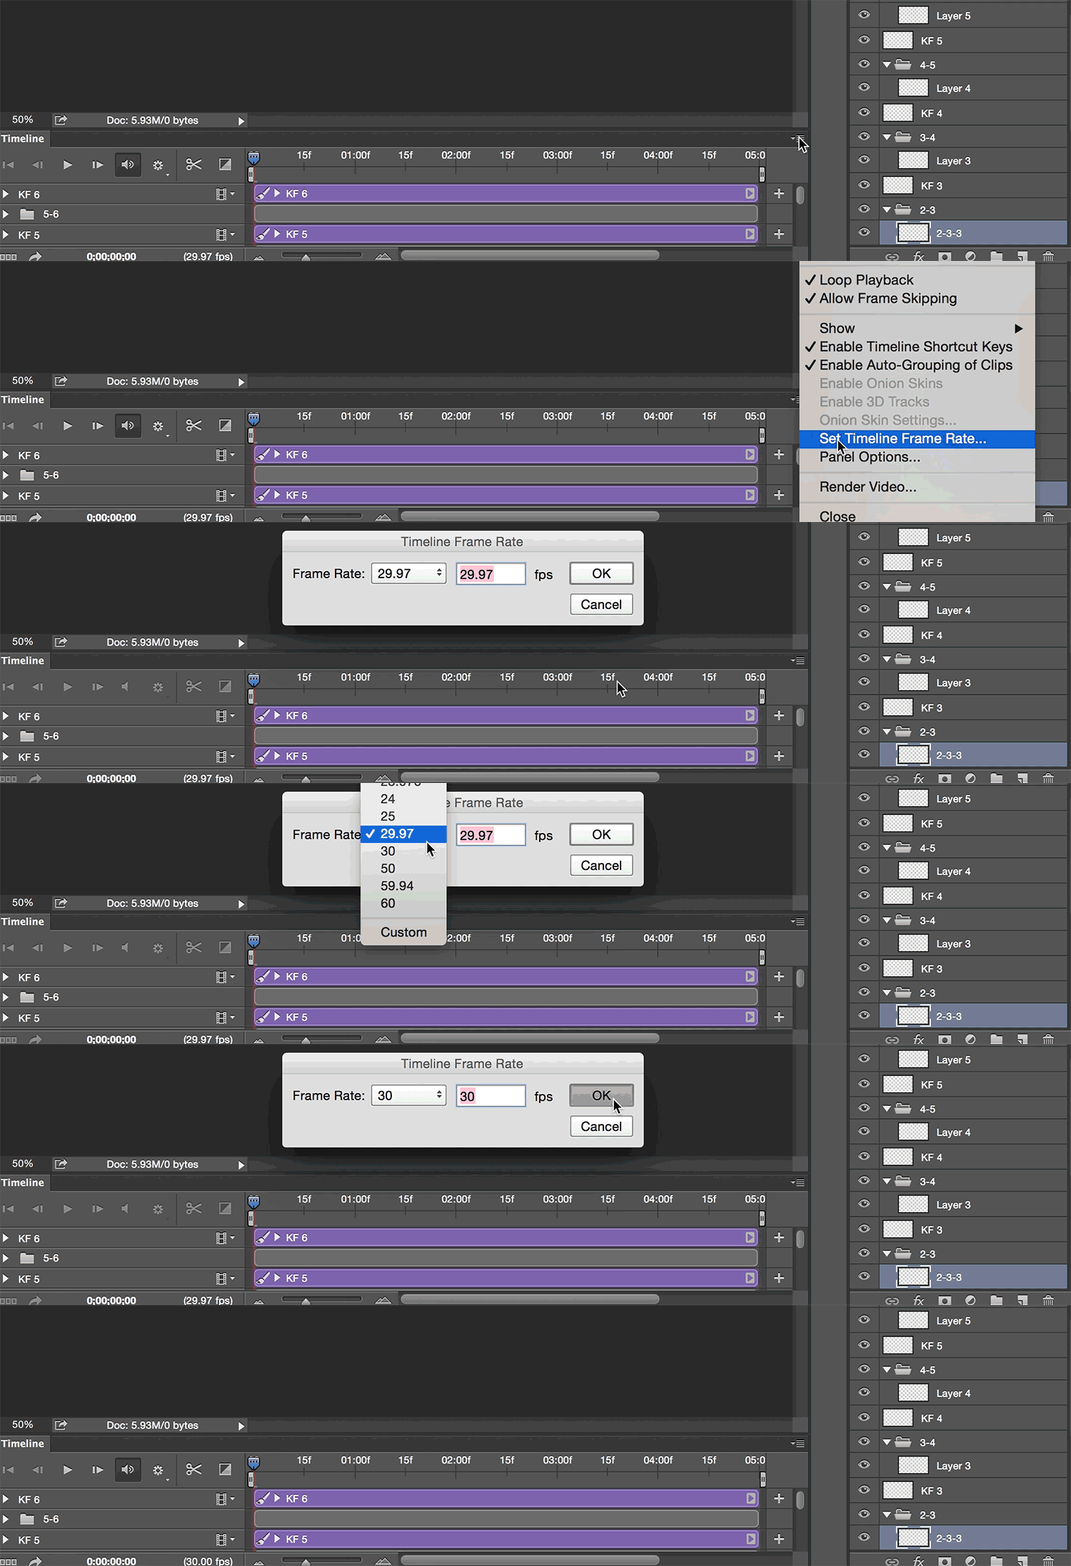
Now that you have that set up, let's get started with animating!
ANIMATING ON PHOTOSHOP
I'm going to start with drawing my key frames and, to make this easier, let's follow this walk cycle guide from The Animator's Survival Kit:

WIth this, I'm going to make a walk cycle on 8's and draw three key frames: 1 (Contact) - 5 (Passing Position) - 9 (Contact). You can choose to add two more layers for key frame 3 and 7, but I decided to skip that for now.
On my "Background" layer, I'm going to draw a horizontal line (hold down Shift while dragging your pen across the screen for a perfect line) in order to keep my feet on the same plane. You can delete this after you're done, if you'd like. And just like the guide shows, I'm only going to be focusing on the feet for now.

Now, as we're moving on to the second key frame, to create the onion skinning effect that is notorious of 2D animation, I am not going to be using the Enable Onion Skins feature of the Video Timeline (though, admittedly, it is useful if you are doing frame-by-frame animation) because, in my opinion, it just gets annoying really fast. You are free to use it, but I wouldn't suggest it at all if you are just starting out with Photoshop. Instead, I'm going to change the opacity of my KF 1 to, say, 50% -- just enough so I can see the next layer pretty easily.

One typical rookie animator mistake is to draw the proportions of your character inconsistently, which is why a character turnaround is useful in providing a reference to the volume of your character's head and body. Notice how I draw the head a few spaces upwards of the first key frame; this is because, during the passing pose, the character will be at its highest height, and at its contact poses, it will be at the lowest height.
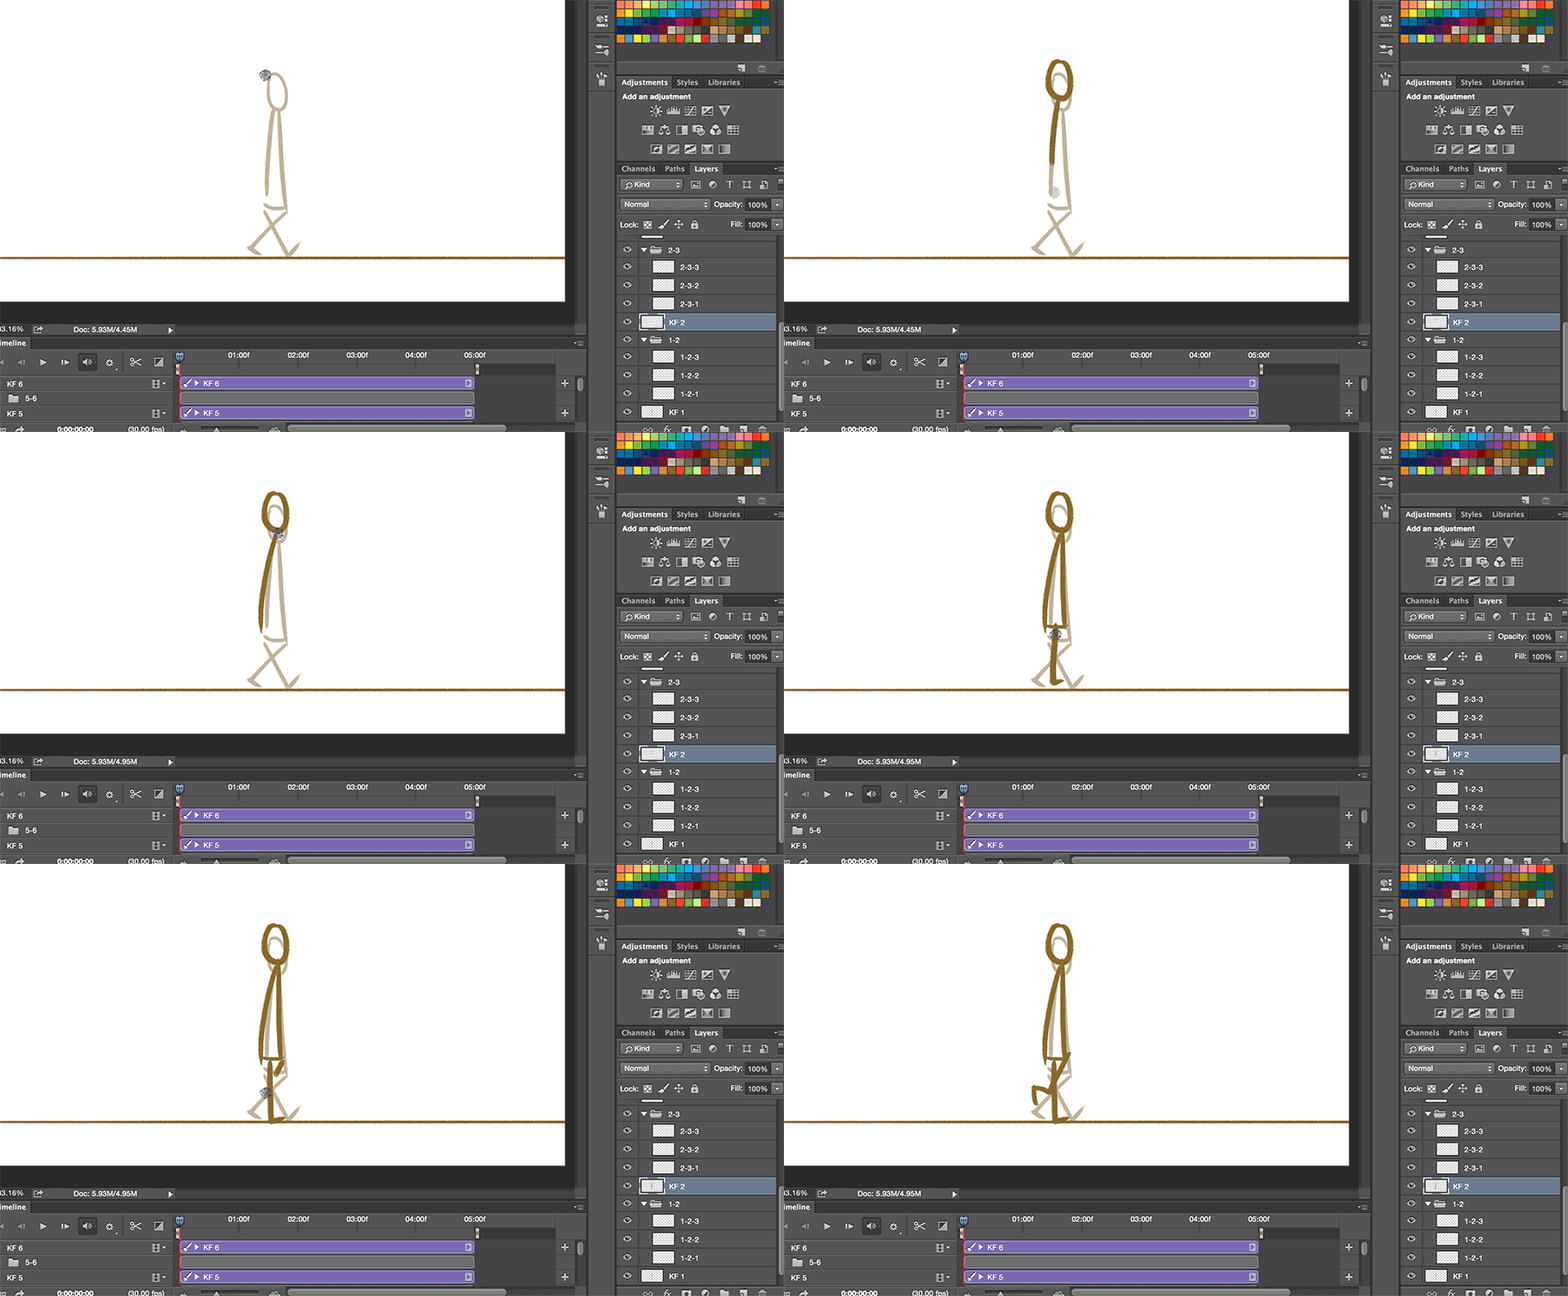
Now that you (hopefully) get the general gist, I'm going to finish up my key frames. I created three extra key frames for practice in keeping proportions, but if you think you're comfortable with maintaining proportions (because I know I definitely still need a bit of practice on that), let's move on.
In this clip, I'm adjusting the proportions of my character and checking back and forth with the different layers to make sure they all match up.
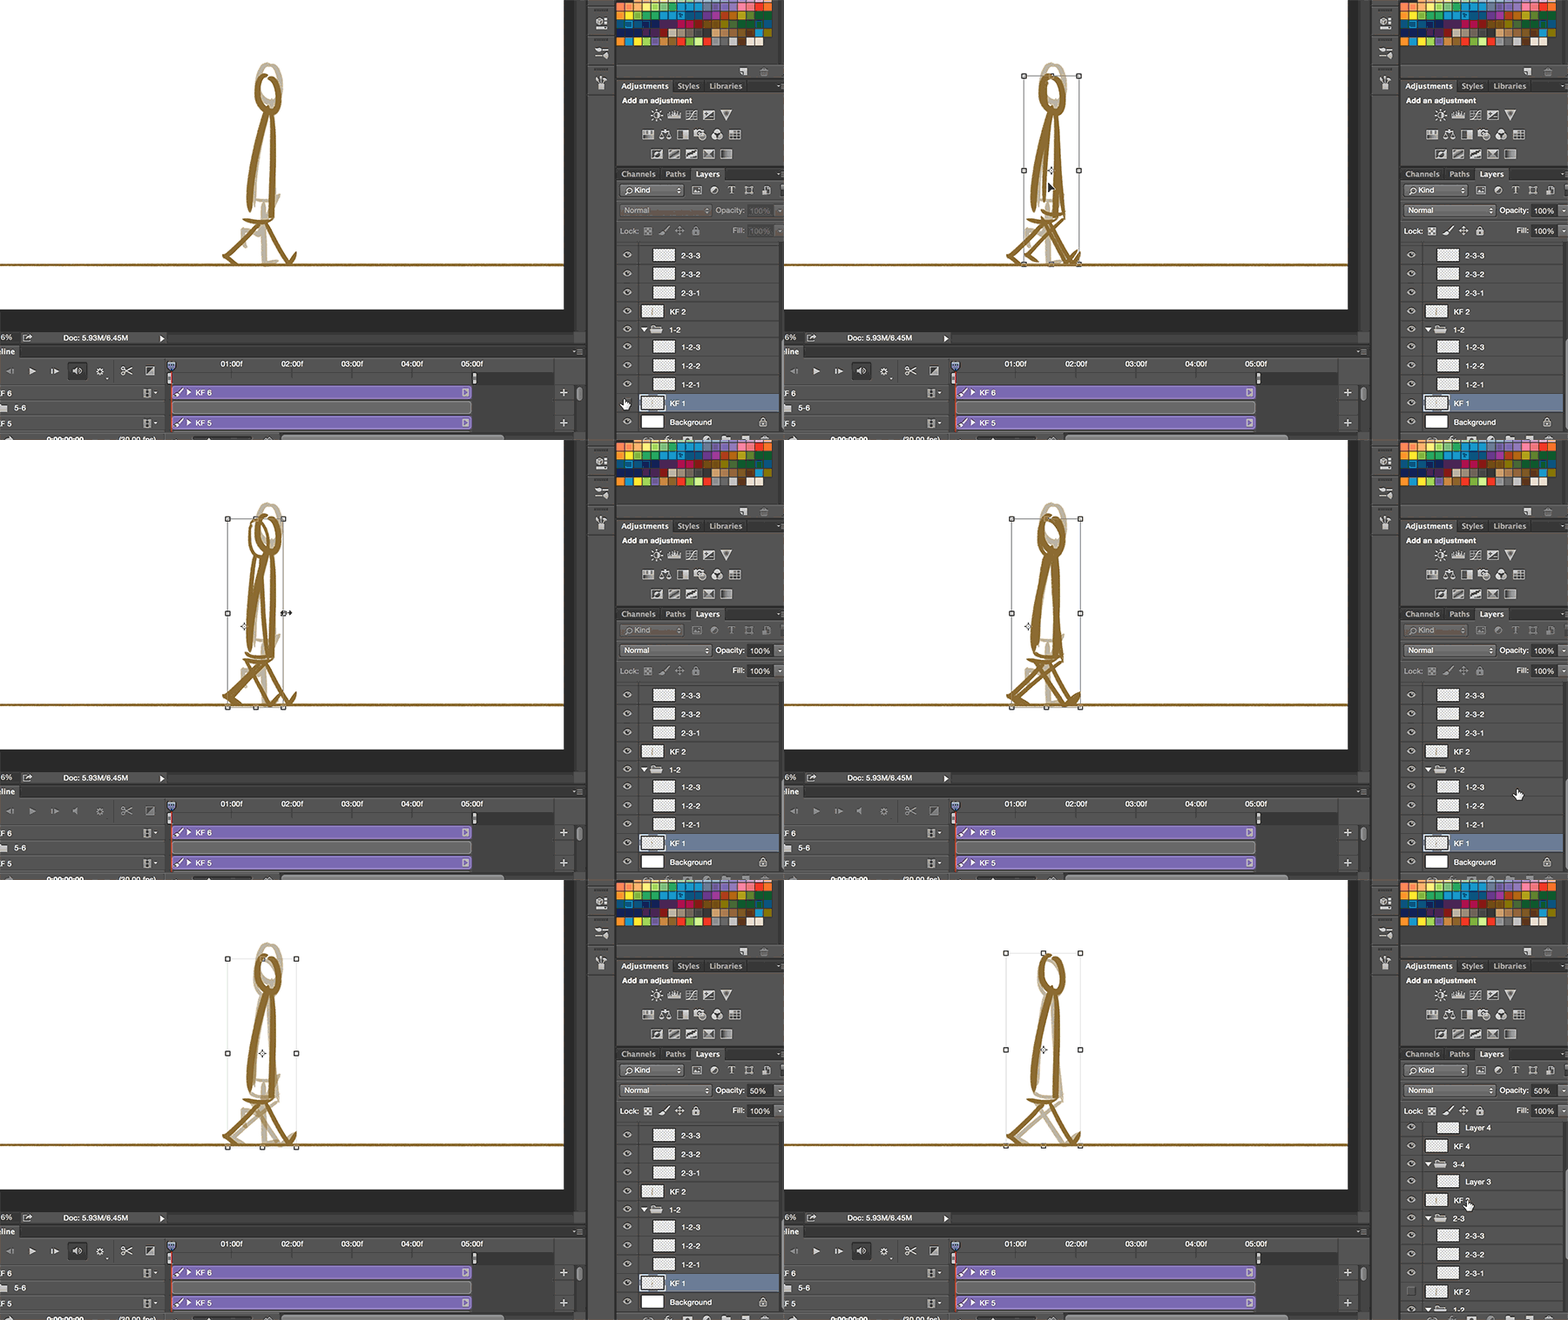
Since we are planning to make a looping GIF, you will want to end your animation on a Passing Pose that will easily segue into the beginning contact frame. So, this will mean that you will have four (4) Key Frames OR eight (8) Key Frames, depending on whether you deleted the "extra" three frames as I explained prior.
FILLING IN THE IN-BETWEENS
Since we have a guide to follow, this process should not be too difficult nor, hopefully, too time-consuming. This is where onion skinning becomes extremely important and the process of organization.
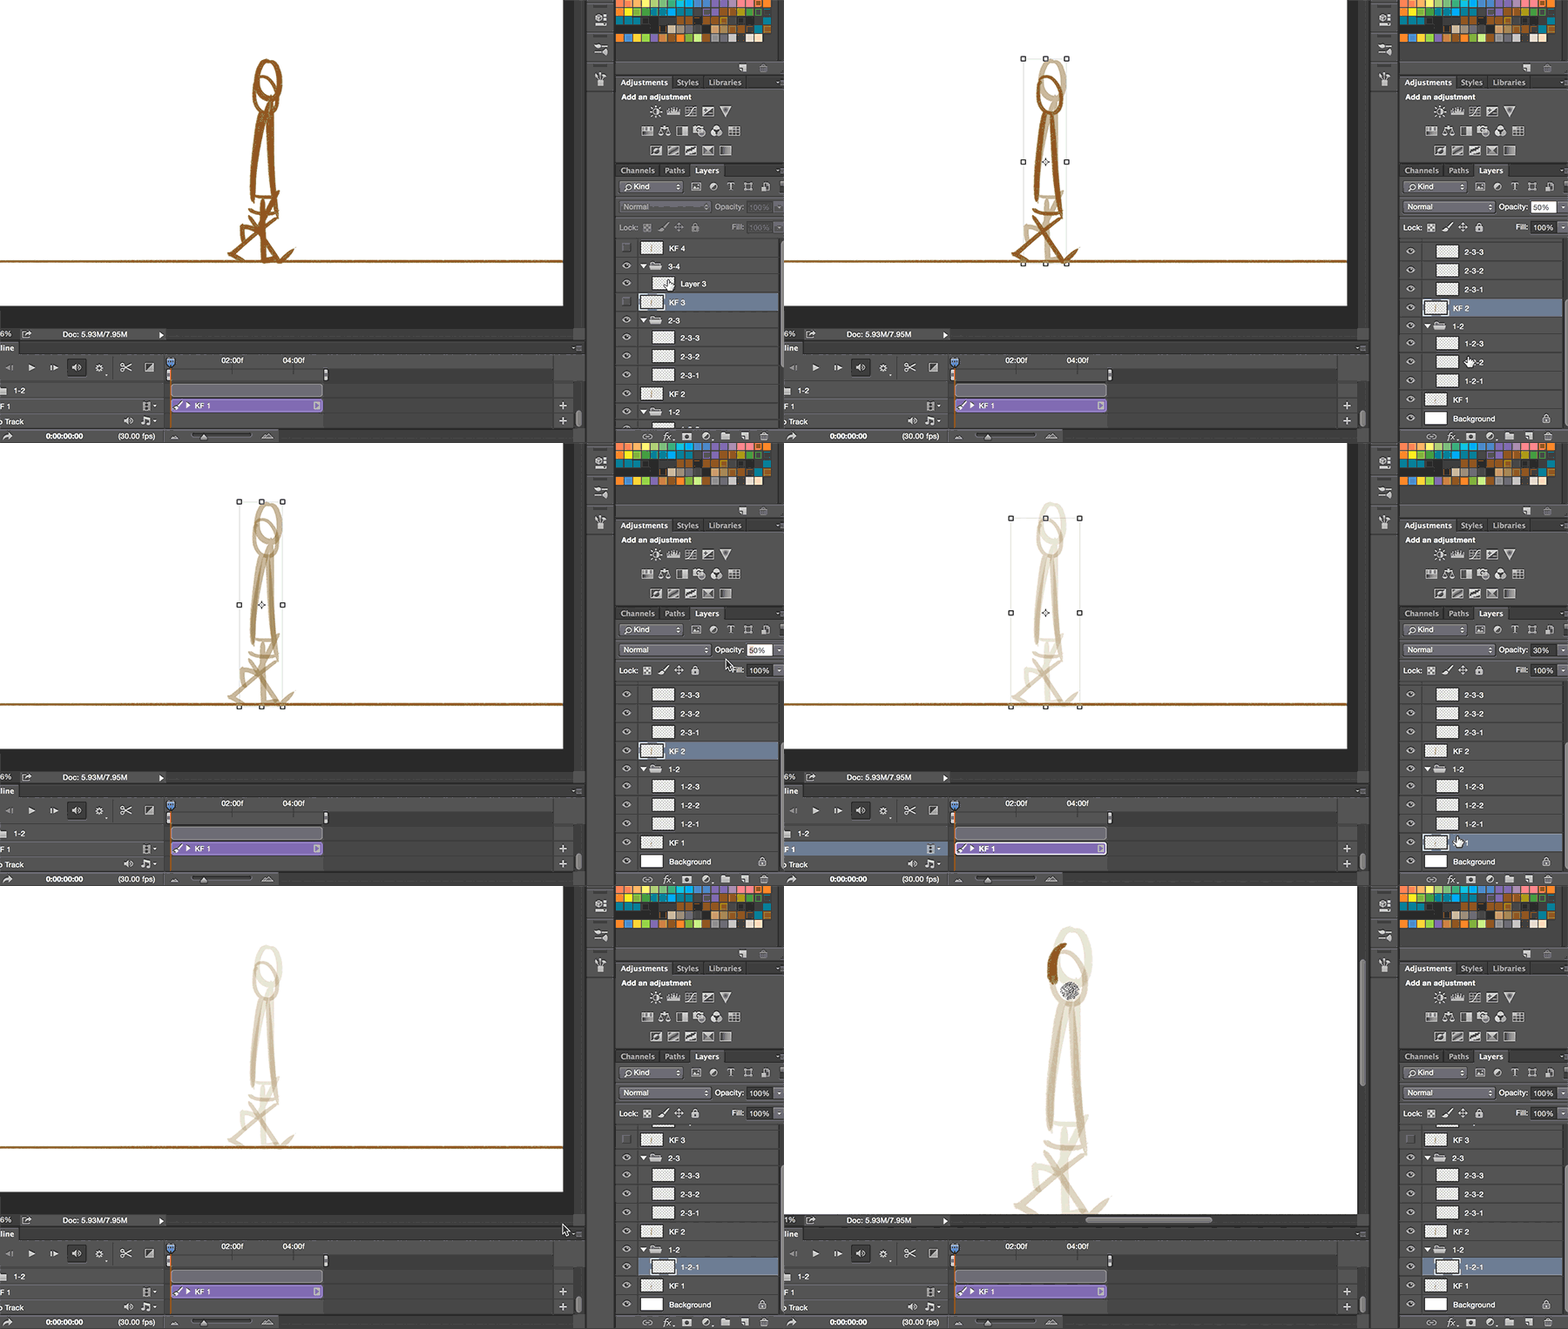
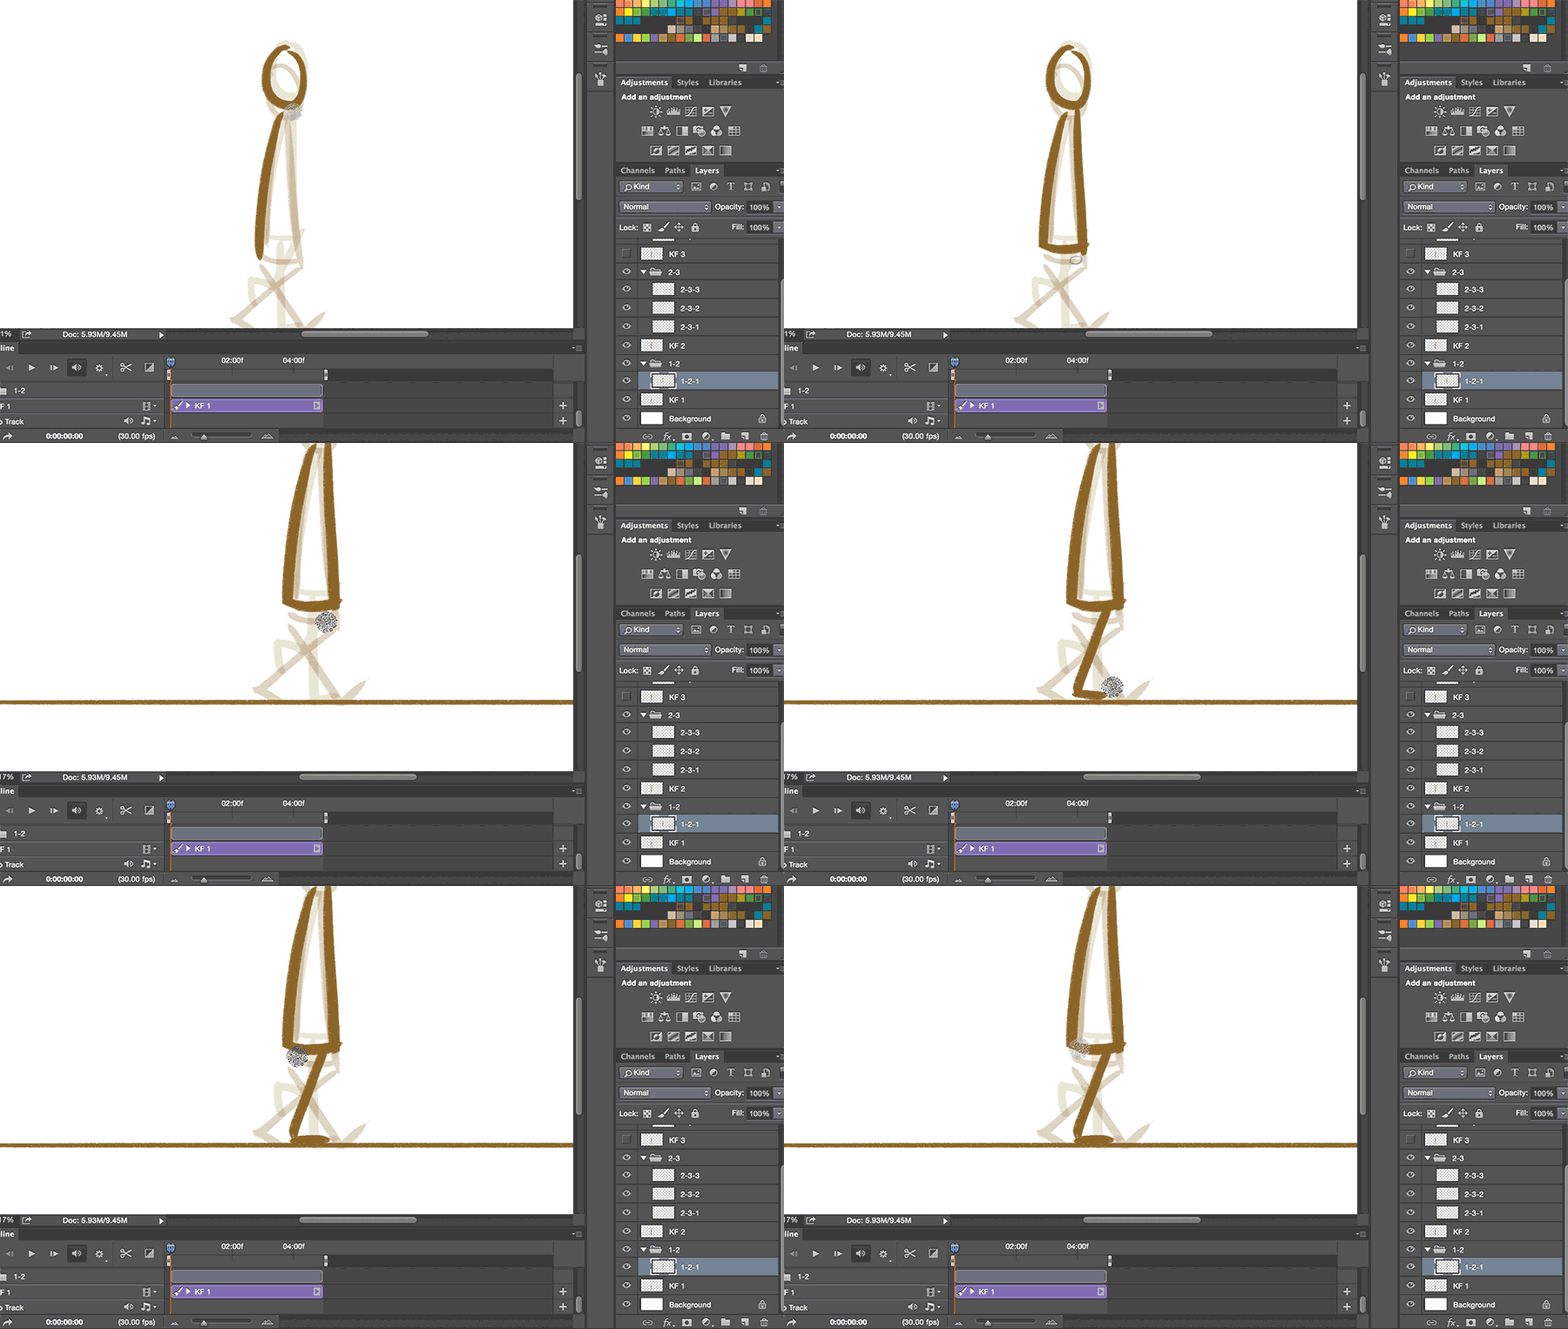
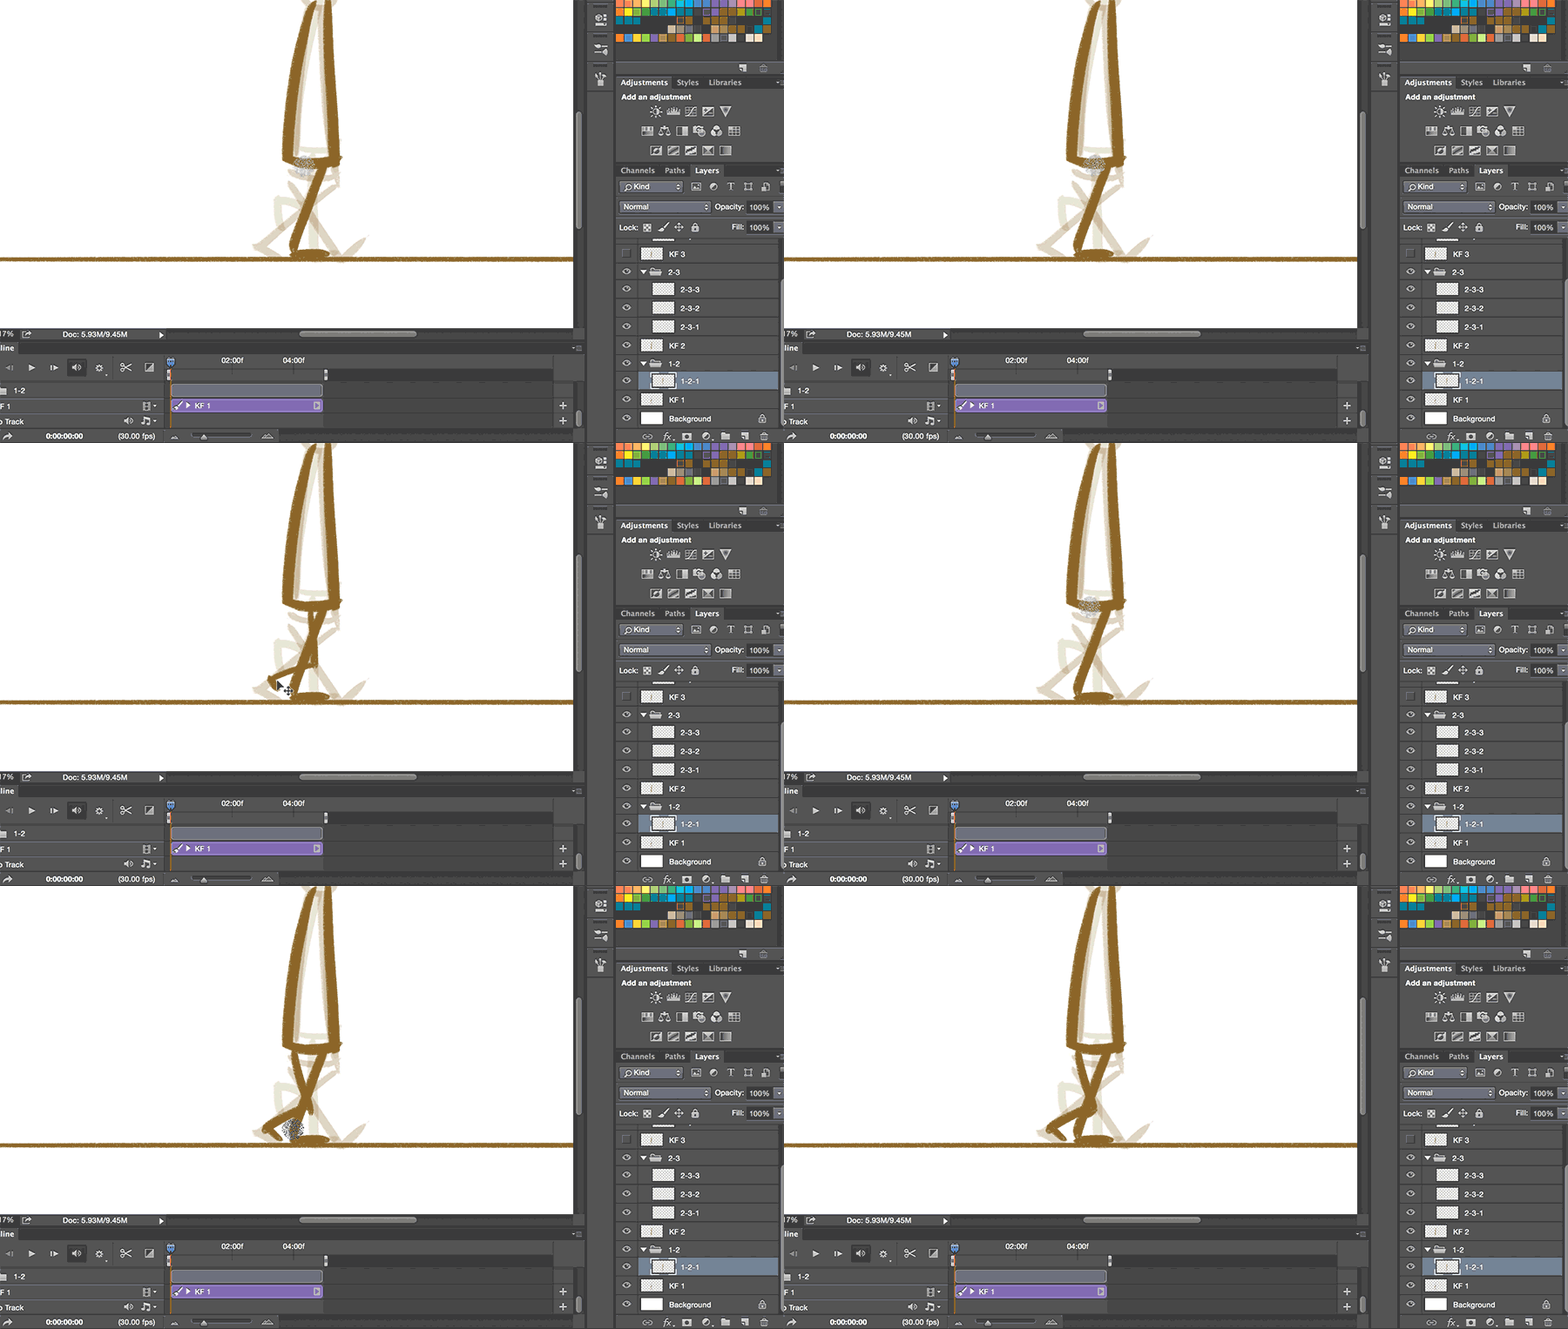
SEEING YOUR FRAMES IN ACTION
Throughout this time, we've been ignoring the video timeline, but this comes into hand when you want to playback your animation. As I stated before, the video timeline is a kind of video editor, so you would want to stack your different layers to start at different parts of time. This is what I mean:

Note that if you have a folder of layers, you'll have to click the downward arrow that's next to the folder icon and adjust the layer from there. Here, you can press the Play button or Spacebar to playback your animation. Adjust accordingly; does your animation move too fast? Change the time of your layer. Does it look too sudden? Add another inbetween. If you would like to distinguish the front and back legs, which I highly recommend you do so you can keep track of the movements in each leg, you can easily just paint over the legs with a differentiating color.
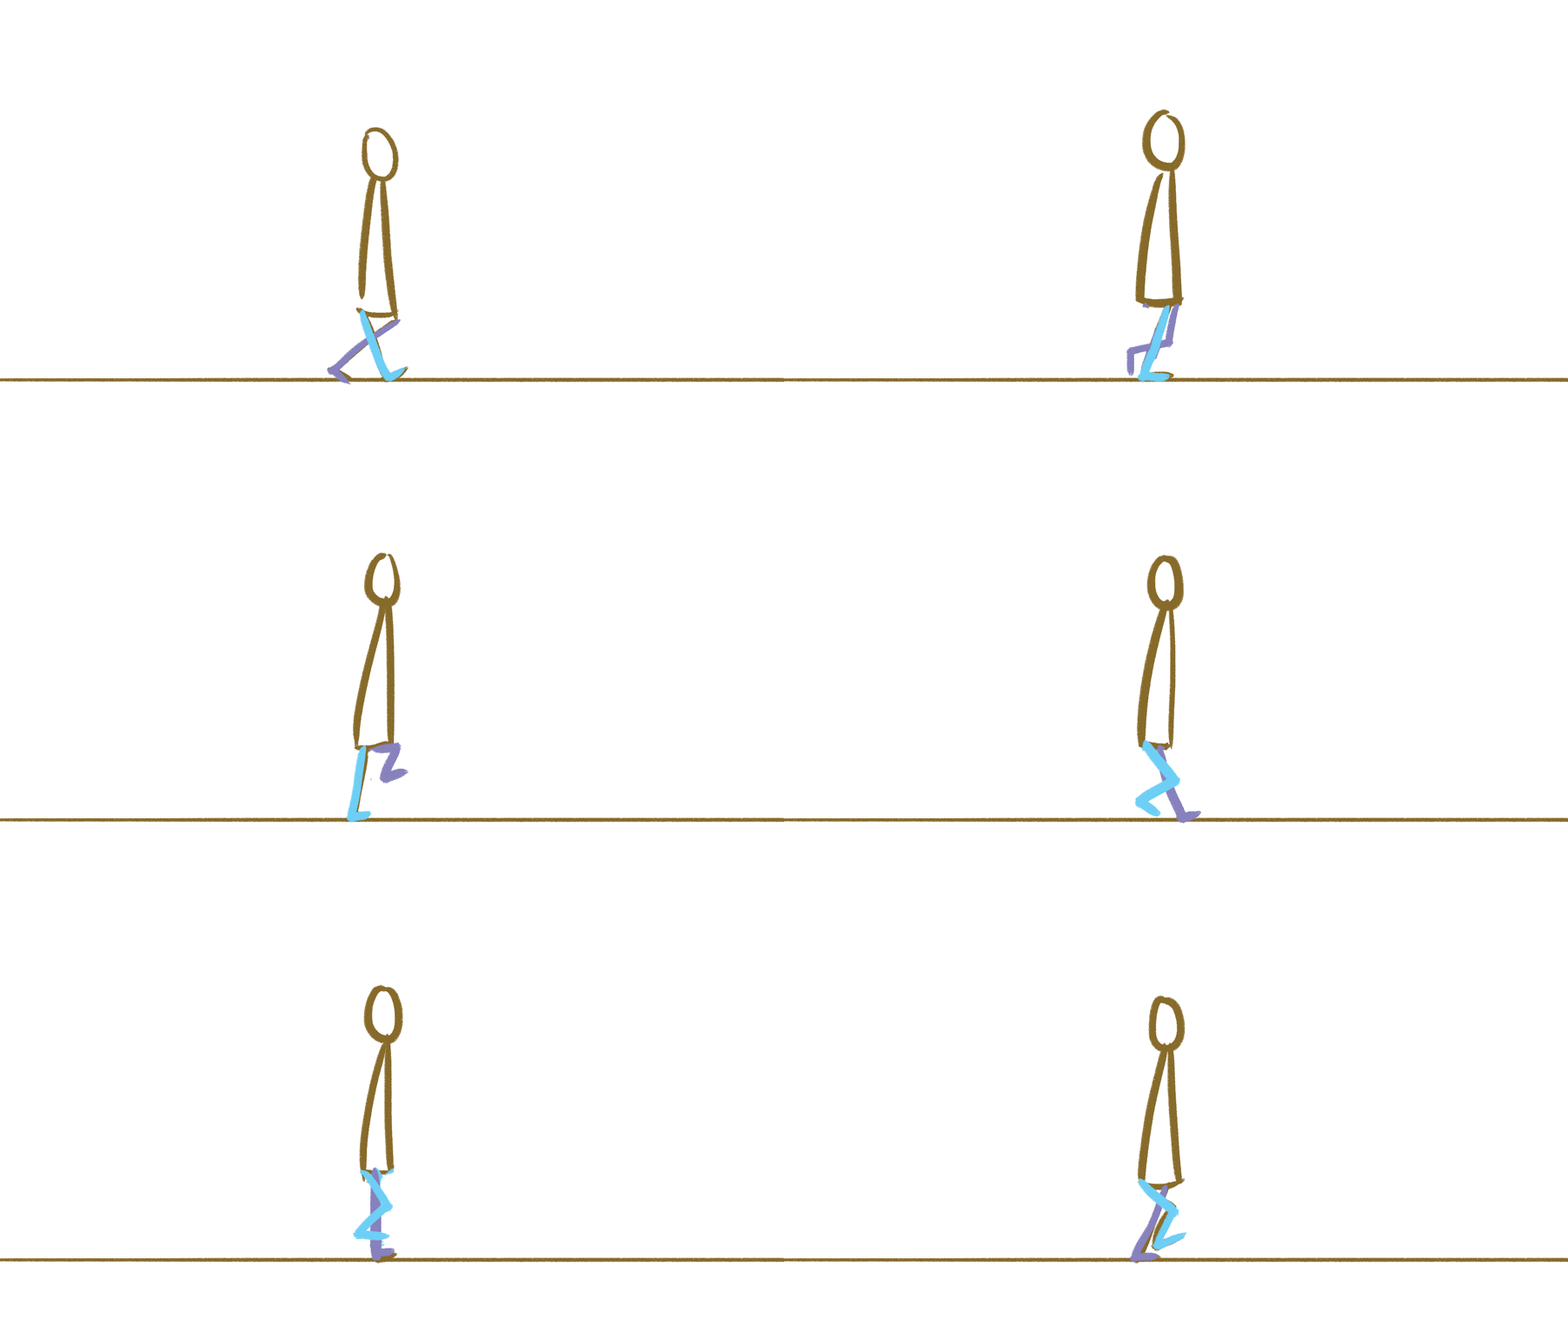
ANIMATING SWINGING ARMS
As you may know, the arms and legs alternate, and what I mean by that is that when the leg goes forward, the arm swings backward. So, similar to how you animated the legs, we want to do that to the arms, but using the legs as a guide for when the biggest swing is and when the lowest swing is. I'll color code the arms too, just for the ~aesthetic~

At this point, you should have enough knowledge to fill in the rest of the in-between frames, so after you finish finalizing your walk cycle (including refining the shoulders, knee positions, head volume, etc.), we'll go straight to exporting this as a .GIF!
EXPORTING YOUR ANIMATION INTO A .GIF
Finally, after all your hard work, you can export your file into a .gif and show your friends and family everywhere! To do so, you will want to go to File > Save for Web, and I'm using the "GIF 128 No Dither" preset. Make sure to make the Looping Options "Forever," and not just "Once," (as it will otherwise only play once, and we don't like GIFs that do that, do we?)
If Photoshop crashes for some reason in trying to export this, you may want to lower the image size.
Rename your file as you wish, and save!


...And now you're done! Congratulations, ya animator! Remember if you have any questions on any of these steps, make sure to contact us at adfa@ucbugg.com. We look forward to seeing your wonderful walk cycles!