WALK CYCLE LAB
LAB INTRODUCTION:
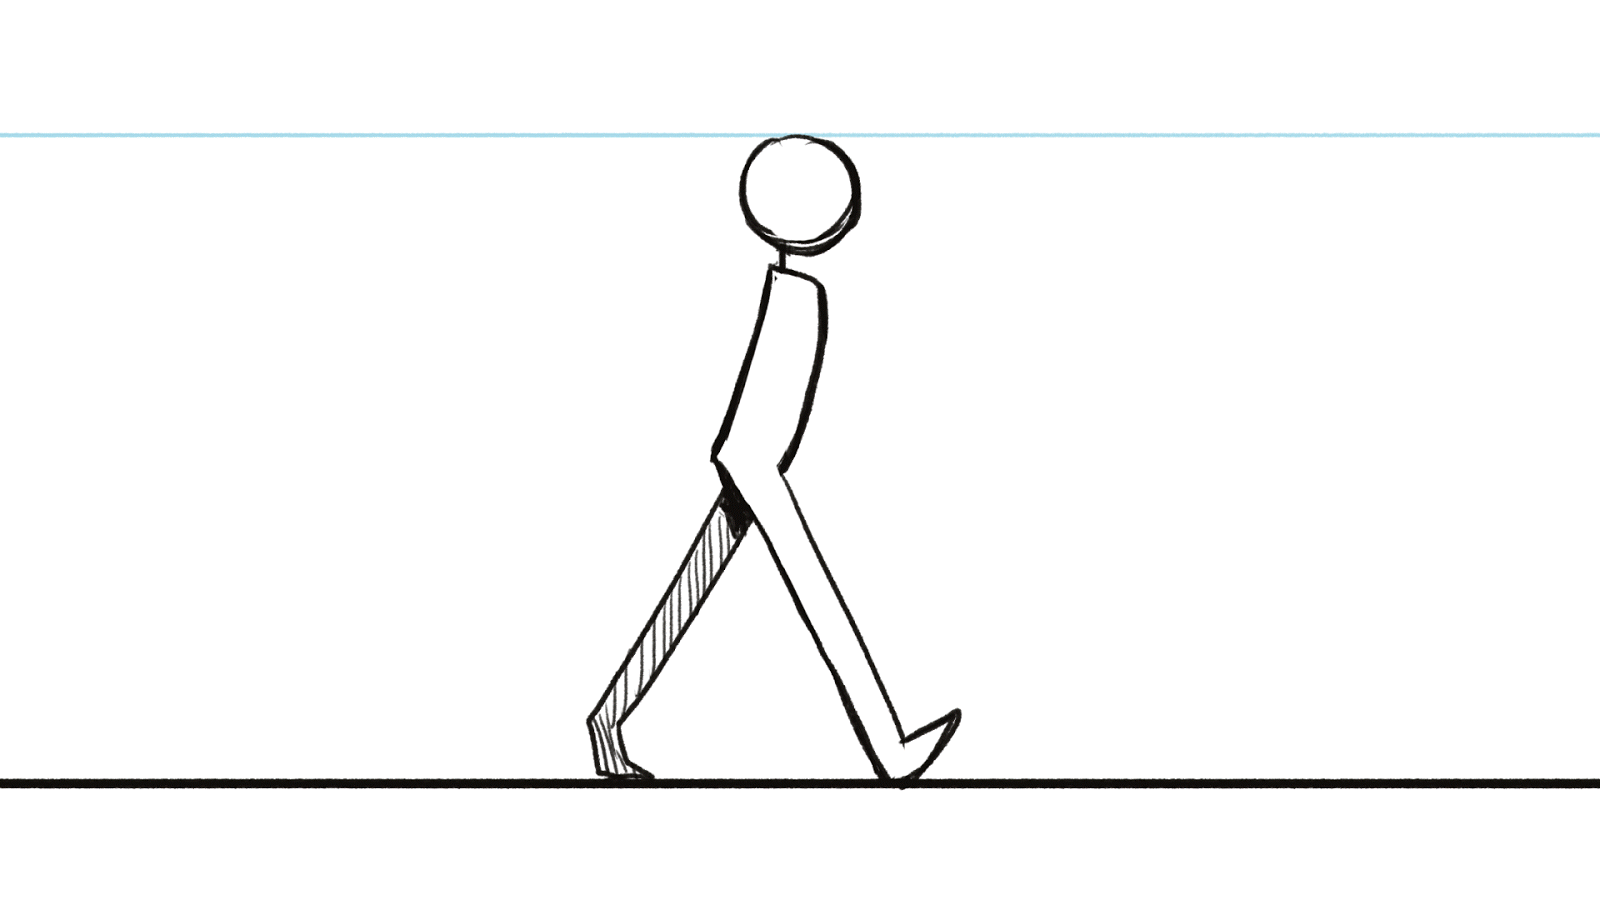
This lab will introduce you to a standard walk cycle. Despite being one of the first animation exercises students do, it’s also one of the most challenging to master; animating a natural walk--especially one that has acting and personality--takes lots of patience. For this lab we will simplify what is required from you and 1) leave out the arms 2) Make the body and head a rigid shape, and 3) use a simple stick figure-esque character. Here is an example of what your final product should be at the end of this lab, but you are welcome (and encouraged) to add the arms or animate a more complex character if you are already familiar with basic 2D animation:
Here is an example of what your final product should be at the end of this lab:
Unlike the bouncing ball, this lab can be completed traditionally on paper or using Photoshop. If you are animating on paper, the principles of animation are the same, you’ll just be stacking/organizing physical sheets of paper instead of Photoshop Layers. You will also have to trace images instead of simply copy-pasting, but many people find animating on paper much more intuitive and easy to organize. Orange text in this lab is specific to those animating traditionally.
If you are animating with Photoshop, this lab will utilize a lot of the same methods and shortcuts as the bouncing ball lab. As a reminder:
Ctrl+N = New File
Ctrl+J = Duplicate Layers/Frames
B = Brush tool
E = Brush tool
Shift+Dragging the brush tool = draw a straight line
Ctrl+A = Select whole layer
Ctrl+C = Copy
Ctrl+V = Paste
Ctrl+Shift+V = Paste in Place
Shift+Moving an object with the Move tool = translate straight up/down or straight left/right
SpaceBar = Play animation
You can only edit/draw on frames that are selected AND being displayed by the slider
SETTING UP YOUR WORKSPACE:
If you are animating traditionally, get 16 sheets of paper (Thin enough to trace with; standard printer paper should be fine) and number the sheets from 1 to 16 in a corner. Make a notation that Frame 1 is “Key1”, Frame 5 is “Breakdown”, and Frame 9 is “Key2”. It would be helpful to have paperclips or binder clips so you can temporarily hold sheets together as you animate, but DO NOT staple anything!! Skip to the the next section of this lab.
This portion is very similar to setting up your Photoshop workspace in the bouncing ball lab, as a result, we will be breezing through this section. If you are confused, refer to the previous lab.
First off, create a new file with a 16:9 aspect ration, or 1920x1080 pixels. Make sure you have Windows>Layers and Windows>Tools checked, then go ahead and open up the Video Timeline under Windows > Timeline.
Open up timeline options by hitting the 4 bars at the top right of the Video Timeline:
From there, Set Timeline Frame Rate to 12 frames per second, then go to Panel Options and change the timeline units to frame number.
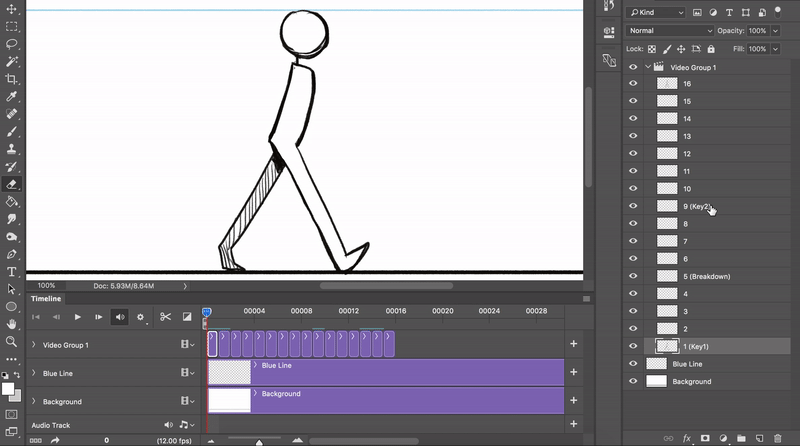
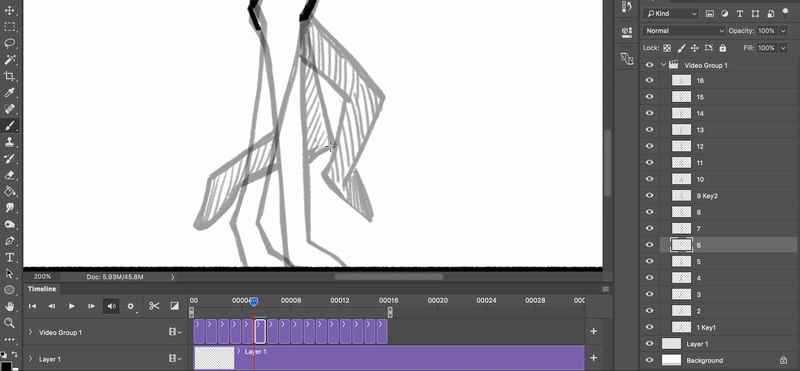
Create a new video group, and under this new video group make 16 frames using the “Select-two-frames then Ctrl+J method”. Make sure the duration of all your frames is 1.
Go into the Layers window and name your frames from 1-16. Name frame 1 as “1 (Key1)”, Frame 5 as “5 (Breakdown)”, and Frame 9 as “9 (Key 2)”. Unlike the bouncing ball, you will be rearranging and shuffling you layers, so it’s very very important to name them and stay organized!

Click on the 4 horizontal bars you used to adjust frame rate earlier in the lab, click on Onion Skin Settings, and set it to display 1 Frames Before.

OVERVIEW OF THE WALK CYCLE:
Before we delve into animating, we need to understand the standard walk. Almost all walks can be broken down into 5 important poses: Contact, Down, Passing Position, Up, and Contact (with the other foot). The images below are taken from Richard William’s Animator’s Survival Kit, a quintessential book for new animators.

In this lab our Keyframes are the contact positions, the moment our heel touches the ground, BUT BEFORE we put our full weight down.

Our Breakdown (the frame in the middle of the two keyframes which bridges them together) is the Passing Position, a pose that shows the back leg passing by the other leg. Note that in this pose, the head and body are higher than in our contact poses. Think about the actual position you’d be in; you are more or less standing with one leg straightened instead of both legs far apart, so you’ll be taller. In a natural walk, your head and body will have a tendency to bob up and down.

Speaking of up and down, between the Keyframes and Breakdown are the Down and Up positions, which refer to the point when our body and head are at their lowest, and the point when they are at their highest respectively. Down occurs when we put our weight onto our front foot, Up occurs when we tip-toe and propel ourselves forward with our back foot. We can consider these Secondary Breakdowns that help bridge the Keys and our first Breakdown.


And here it is altogether. Notice the way the head and hip oscillates up and down as the character walks.

Disclaimer: This is a very standard and formulaic walk cycle that’s good for beginners. However, in real life all walks are unique. Changing the breakdown pose, exaggerating certain frames, or modifying the body’s posture and weight distribution will create different walks with different personality
KEY FRAMES:
Now to move on to the actual animating! We made 16 frames, so we will be “animating on 8’s”, aka one step with the right foot will take 8 frames, and on the 9th frame we begin stepping with the left foot. This diagram will be our template for the rest of the lab:

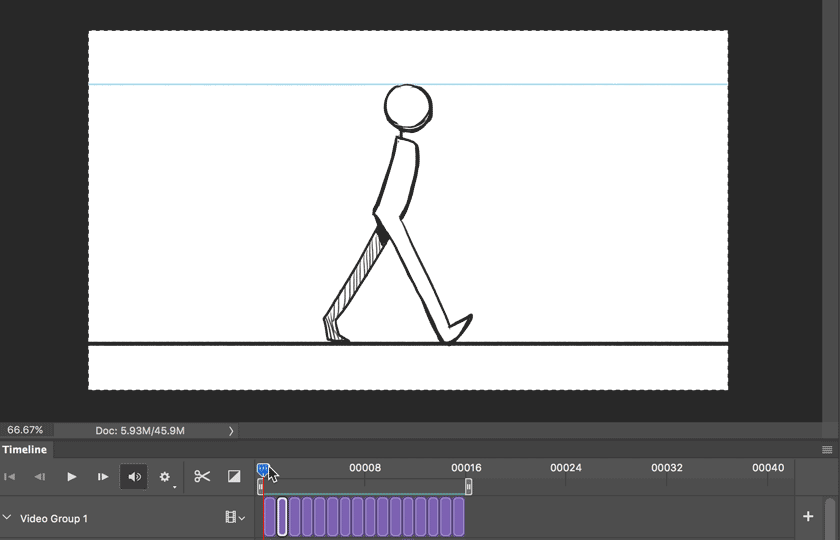
First, draw a straight line on the “Background” layer just like you did with the bouncing ball, making sure that this layer is visible for the entire duration of the Timeline. If working traditionally, you should draw and trace the same ground line on Frames 1,3,5,7 and 9.
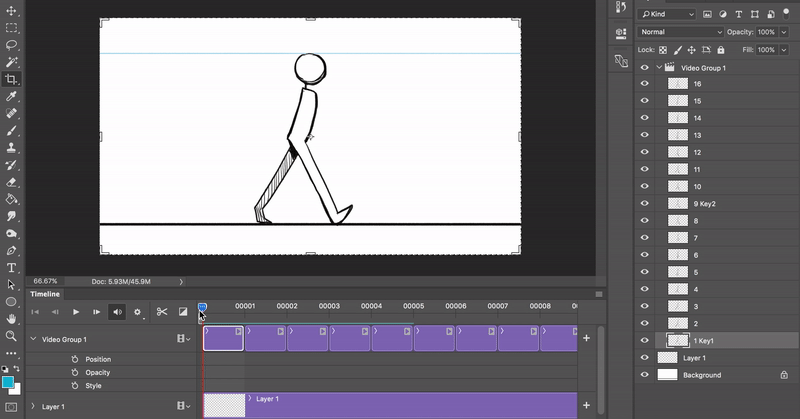
Draw the contact pose with the right foot forward on frame “1(Key1)”. I shaded the left leg so it’s easier to visually differentiate the left and right legs, but you don’t have to [if fact, it’ll save you a lot of busy work later on if you don’t shade it]. I also made a blue line on a separate layer outside the video group to keep track of how high the head of my original contact pose is.

Make sure Onion Skins are enabled, then go to the Layers window and click+drag the “9(Key2)” layer so that it sits on top of Key1. With the slider still on Key1, hit Ctrl+A (Select all), Ctrl+C (Copy), click frame “9 (Key2)”, then hit Ctrl+Shift+V (Paste in Place). Remember: You can only edit/draw on frames that are selected AND being displayed by the slider. Erase and modify the hip area and legs of Key2 so that the left foot is the one making contact in front.
If working traditionally, make sure your frame 1 and frame 9 papers are aligned properly, then trace the silhouette of frame 1 onto frame 9 and modify the drawing so that the left foot is the one making contact in front. A binder clip helps to make sure your papers don’t drift around while drawing.

It’s good practice to check your animation constantly. Un-enable Onion skins and scrub through (or physically flip through your paper) to check for consistency and see how the animation flows.
Right now, our animation tells us “this character is walking”, but we have no information between Key1 and Key2.
BREAKDOWNS:
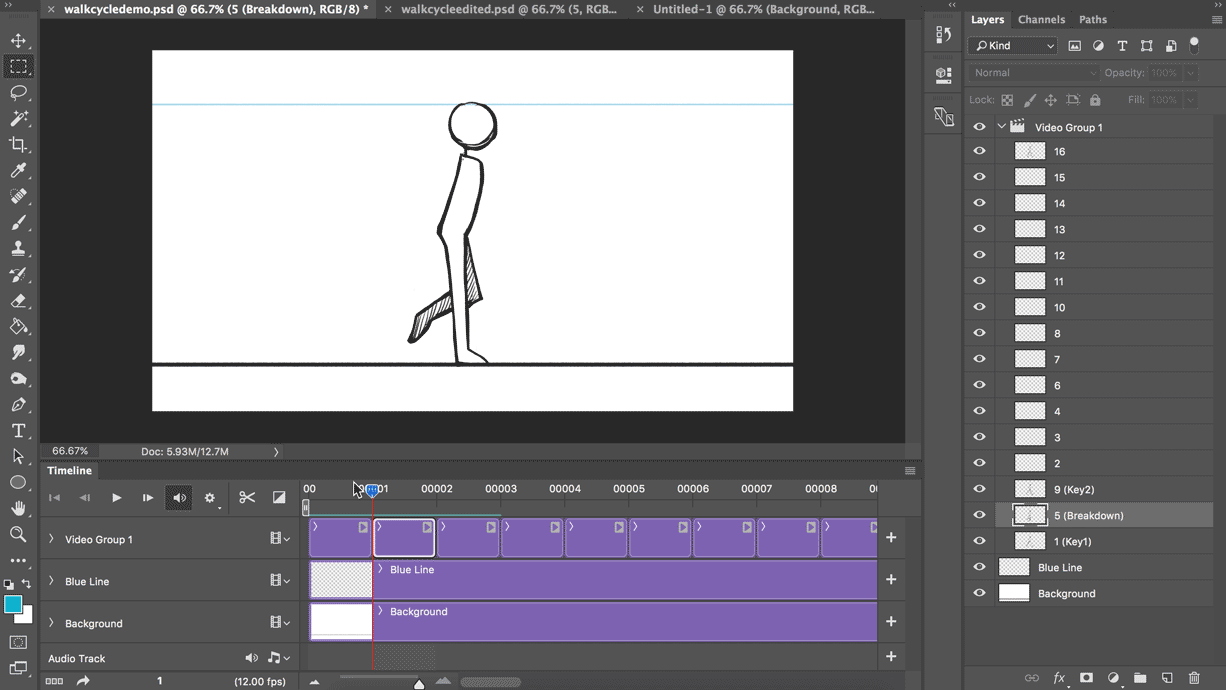
After finishing the keyframes, we need to draw the first breakdown frame. Rearrange your photoshop layers so that frame “5 (breakdown)” is sandwiched between keyframes one and two.

Copy Key1 and Paste-in-Place on frame 5 just like before. Using the Move tool, shift the breakdown figure just slightly higher than Key1, with the blue line as a guide. Now erase the legs and redraw them in the Passing Position, keeping in mind that the left foot is passing behind the right foot.
If drawing traditionally, lay frame 5 on top of frame 1: shift frame 5 down slightly and trace the body, before re-aligning and drawing the legs.
Here’s a close-up of my breakdown, showing how slight the shift in height is compared to the onion-skinned Key1 below it. You can achieve a more bouncy and energetic walk by having a bigger shift in height:

Un-enable Onion skins and scrub through (or physically flip through your paper) again. It’s important that the breakdown feels like a logical midpoint between the keys, and even with just these three frames we can see the basic walk taking form.
The next step is to add the Down and Up poses. Repeat the same steps as drawing the Passing Position, rearrange the layers/papers as needed to onion skin them. Keep in mind that the Down pose will be on frame 3 and is the lowest point below the blue line, while the Up pose is on frame 7 is slightly higher that the Passing Position.


Here’s my animation so far (with only the right step [frames 1,3,5,7,9] finished so it’s not a smooth loop):

You can see that with just these 5 frames we have a solid idea of what the movement it like. Tweek and redraw your frames as needed, and once you’re satisfied with frames 1,3,5,7, and 9 it’s time to do frames, 11,13, and 15. Thankfully, you can simply copy frame 3 (the down pose) onto 11, frame 5 (passing pose) onto 13, and 7 (up pose) onto 15, then modify the legs so that you switch the left and right position.

(Notice that these mirrored poses are 8 frames apart; remember how we’re “animating on 8’s”?)
Here’s our animation with the left step filled in to complete the cycle:

IN-BETWEENS:
We’re at the point where our timing and poses are pretty much tied down, and we have a decent walk cycle. But we’re not done yet; time for the dreaded in-betweening. Let’s revisit the original template:

In-betweens are exactly what they sound like: intermediate frames between two images to give the appearance that the first image evolves smoothly into the second image. We need to add in-betweens on frames 2,4,6, and 8 to really smooth out the walk cycle, then copy and modify the same in-betweens onto frames 10,12,14, and 16.
Click on Onion Skin Settings, and set it to display 1 Frames Before and 1 Frame After.

If you are working traditionally, you’ll be stacking the blank frame 2 on top of frame 1 and 3 then tracing. It helps to hold up your paper to a light source (or work on a glass surface with light underneath) to see better, but the most important trick is to be diligent about flipping back and forth and checking for consistency and flow.
If you are working digitally, rearrange your layers so that they are back in order from frame 1 to frame 16. You have the advantage being able to copy-paste-move the body on each frame, but don’t get sloppy: always scrub through the timeline to see if you’re in-betweens flow well.
Here’s me scrubbing through frame 1, a finished in-between frame 2, and frame 3. There are definitely imperfections in my in-between, but if it flows well when you scrub through
~*~it’s good enough for government work~*~
In-betweening takes patience and can be a tedious eyesore, but here are three things to keep in mind:
-
You aren’t “morphing” from one breakdown to the next. The joints should behave like joints. In fact, you might approach your in-between by focusing on the position of joints. Here’s an example with in-between 6:
-
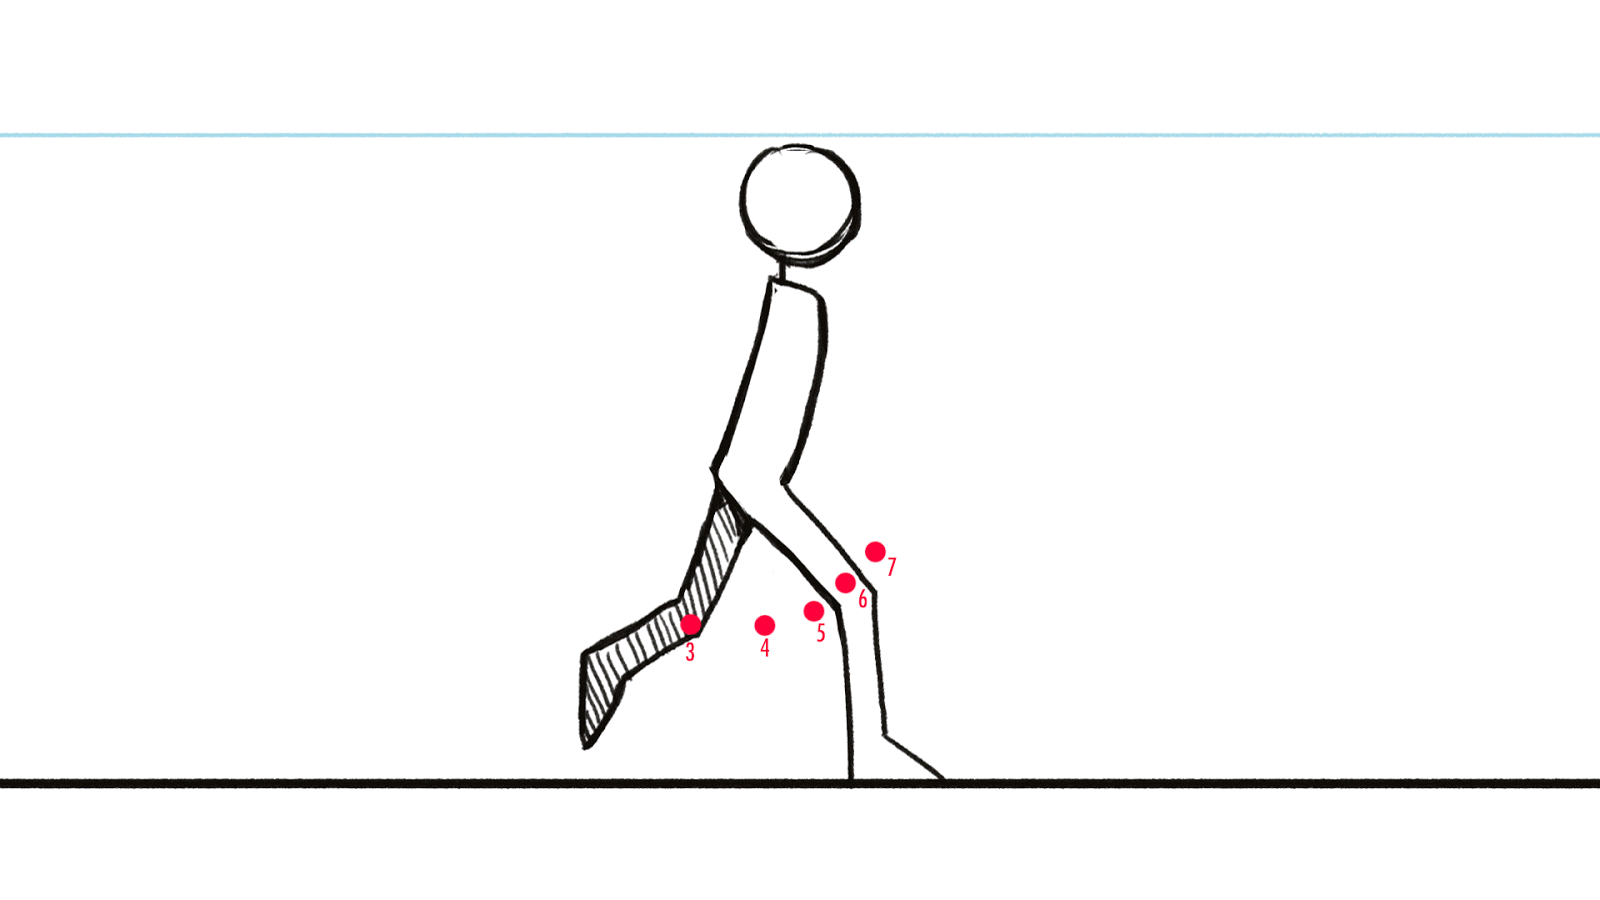
Speaking of joints, human and animal parts tend to move in arcs, not straight lines. Hence, if I were to track the position of the left knee from frames 3(Down) to 7(Passing) it forms an arc.
-
Contrary to what I did in the gif for point #1,your in-between doesn’t have to be the exact midpoint of two frames. Here--between frame 7(Up) and frame 9(Contact)--my frame 8 is much more similar to the position for frame 9. In other words, in-between 8 “favors” frame 9. When animated, this means that the foot is brought down very quickly before contacting the ground. Remember timing charts? On a timing chart, the tickmark for 8 would be closer to the tickmark for 9, and farther from the tickmark for 7.

EXPORTING AS A GIF:
At last, 16 drawings later, here’s our looping walk cycle.

Just like the Bouncing ball, go to File > Save for Web. Make sure to change the Looping Options to "Forever," and not just "Once". Name your exported file as [NAME]_WALKCYCLE, and click Save (Hitting “Done” will only save your setting and not the file). Now attach or add your .gif file to an email and send it to adfa@ucbugg.com!
If you did your lab on traditional paper, then you can scan your pages with a home or library scanner (we really don’t recommend photographing because your image will easily shift around and change lighting colors), then compile the 16 frames on a video editor just like an animatic, except each image is 1/12 of a second. You can export it as an .mp4, attach it to an email, and send it to us! If you reaaaaallly run into a lot of trouble with scanning and compiling, then you can turn in the physical pages clipped together during class next week. Just note that this way you won’t be able to see the fruits of your labor in real 12 fps animation.